Check out this beautiful toy chair made of pegs. It was given to the children by their Granny who had had it for many years. How cute is it?!
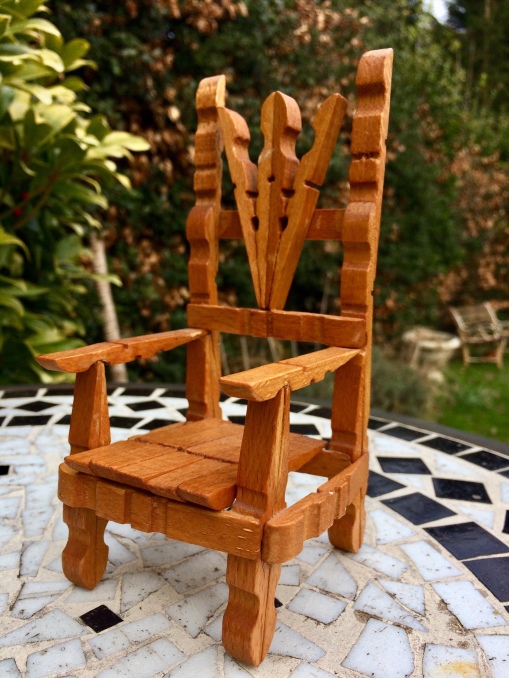
M asked to make one so we set about dismantling a load of pegs (15 to be precise) and began the process of copying, gluing and sticking. We used PVA glue to stick the pegs together.

We looked at the front and back of the chair and re-created each section. We made the area to sit on and then attached each section together. I’ve called this post a ‘How to’ but really I’m asking you to do what we did and copy what you see and attempt to put together a chair.


We made this chair over a couple of weeks. We had to let each small part dry before adding on to it or joining the parts together.
So if you’ve got patience and fancy giving this project a go take a good look at the photographs! I’d love to hear about it if you give this project a try 🙂
Maybe next time we will design a table!

This is so Awesome! I love the chair. & Well done to your kid who seem to be well into this kind of thing. Well done you! xx #FabFridayPost
LikeLiked by 1 person
Thanks Su, time to design that table!!
LikeLike
What a fantastic project! The chair is beautiful!
#FabFridayPost
LikeLiked by 1 person
Thanks Veronica 🙂
LikeLike
This is beautiful and I’m sure will be treasured forever 🙂 Thank you for sharing it with us. We’re not crafty and I’d probably glue myself to it!
LikeLike
O wow! I am so impressed – this looks amazing and so effective! #FabFridayPost
LikeLiked by 1 person
It’s rather cute and works well as a chair for a soft toy.
LikeLike
Never seen anything like this before but very clever and may give it a go! #FabFriday
LikeLiked by 1 person
It’s a fun one. We might try to design a matching table!
LikeLike
What a fun crafting project. That is quite clever. #FabFriday
LikeLiked by 1 person
Yes it was rather fun 🙂
LikeLike
Hi, I’ve never seen a chair like this before what a great chair the kids have made. No doubt this one will also be treasured #fabfriday
LikeLike
Let’s hope it lasts a long time!
LikeLike
This is so precious! Kids are always so proud to play with something that they made themselves!
#FabFridayPost
LikeLiked by 1 person
Yes, we do have a lot of homemade toys, it’s so lovely to see them playing with what they have made.
LikeLike
Oh my gosh this is incredible and beautifully put together X #fabfridaypost
LikeLiked by 1 person
awww thanks. The design is really clever 🙂
LikeLiked by 1 person
Oh this is such a cute chair! Well done to you and your kids for having the patience to do it. It would look lovely in the garden. #FabFridayPost
LikeLiked by 1 person
Good idea for the garden. Trying to declutter the house so more things living in the garden is a fab idea!
LikeLike
This is fab! We made a snowflake out of pegs at Christmas, they are so versatile aren’t they! #fabfridaypost
LikeLiked by 1 person
Yes so much can be done with a few pegs. Maybe a bird feeder next!
LikeLike
Excellent wooden project without much of cutting, sanding involved!
Kids must have enjoyed it, except the waiting part for drying the glued pegs. That too is a part of life lesson, I believe.
LikeLike
Yes, we had to wait for the glue to dry the different sections before moving on! Patience required!
LikeLike